Connecting to Your Linux Server via SSH
This guide provides step-by-step instructions to connect to your Ubuntu-based VPS using SSH. Follow the steps below to get connected.
Before You Begin
-
Check Your Login Details
After purchasing your VPS, you should receive an email with your server’s IP address, username, and password. You can also access these details by reinstalling the operating system via the panel. -
Install an SSH Client
- Windows: For Windows users, in addition to using PuTTY., you can connect to your Ubuntu VPS directly from the Command Prompt (CMD) using Windows' built-in SSH client. Follow the steps below.
- macOS & Linux: You can use the Terminal app. SSH is pre-installed on most macOS and Linux systems.
Connecting to Your Linux VPS via SSH

Steps to Connect to Your VPS using PuTTY
-
Open Your SSH Client
- Windows: Launch PuTTY.
-
Enter Server IP Address
- In PuTTY, type your server's IP address in the "Host Name (or IP address)" box.
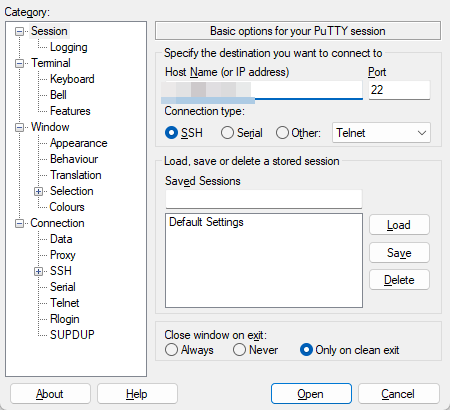
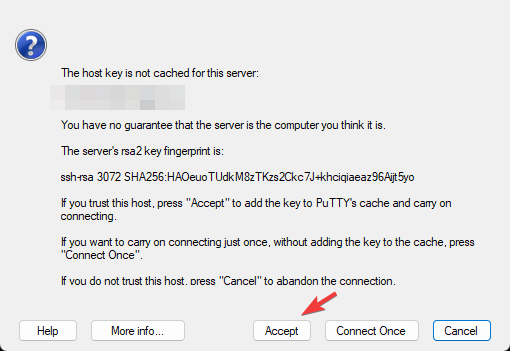
- Click Open and accept the rsa-key fingerprint
-
Enter Username
- For Ubuntu VPS, the default username is usually
rootunless specified otherwise in your welcome email.
- For Ubuntu VPS, the default username is usually
-
Enter Password
- PuTTY: When prompted, enter your password from the welcome email.

-
Successful Connection
- If everything is correct, you should now see the command line interface of your Ubuntu server.
Troubleshooting
Problem: "Permission Denied" or "Authentication Failed"
- Solution: Verify that you entered the username as "root" and that the password is correctly typed, without any extra spaces. You may also try copying the password from your email again.
Problem: "Connection Timed Out"
- Solution: Check if your VPS is running and ensure that SSH is enabled. If the issue persists, contact support for assistance.


